A pool sand filter is an essential component of your pool’s filtration system, responsible for keeping your water clean and clear by trapping dirt, debris, and other impurities. Over time, the sand in your pool sand filter can become worn out, leading to reduced filtration efficiency and cloudy water. Replacing the filter sand is a necessary maintenance task that helps ensure your pool remains in top condition. In this blog, we will guide you through the process of replacing the filter sand in your pool sand filter, ensuring that your swimming pool stays sparkling clean all season long.
Why Replace the Filter Sand?
The sand inside a pool sand filter is specifically designed to capture particles and debris as water passes through it. However, after several years of use, the edges of the sand particles become rounded and smooth, reducing their ability to trap debris effectively. Additionally, oils, dirt, and other contaminants can build up in the sand, leading to clumping and reduced water flow.
Typically, it is recommended to replace the sand in your pool sand filter every 3-5 years, depending on usage and the size of your pool. By doing so, you ensure that your filter is operating at its best, keeping your pool water clear and reducing the strain on your pool’s pump and other equipment.
Tools and Materials You’ll Need
Before you begin, gather the necessary tools and materials:
- Replacement sand (make sure to use pool filter sand, usually 20 silica sand)
- A screwdriver or wrench (depending on your filter model)
- A shop vacuum or scoop
- A garden hose
- Teflon tape (optional)
- Lubricant for O-rings (optional)
- A tarp or plastic sheeting (to catch old sand)
Step-by-Step Guide to Replacing the Filter Sand
1. Turn Off the Pump and Filter System
Before starting any maintenance on your pool sand filter, make sure to turn off the pool pump and filter system. This will prevent any water from flowing through the filter while you’re working on it. It’s also a good idea to turn off the power to the pump at the circuit breaker to avoid any accidental activation.
2. Relieve Pressure from the System
Next, relieve the pressure in the system by opening the air relief valve on top of the filter. This step is crucial for safety, as it releases any built-up pressure inside the filter that could cause water or sand to spray out when you open it.
3. Remove the Filter Valve or Multiport Valve
To access the sand inside your pool sand filter, you’ll need to remove the filter valve or multiport valve, which is typically located on top of the filter tank. Depending on your filter model, this might involve loosening a few bolts, clamps, or screws. Carefully lift the valve off the filter, making sure not to damage any attached pipes or hoses.
4. Drain the Filter Tank
Once the valve is removed, the next step is to drain any water remaining in the filter tank. Most pool sand filters have a drain plug at the bottom of the tank. Remove this plug and allow the water to drain out completely. It’s a good idea to place a tarp or plastic sheeting underneath to catch any sand or debris that might spill out.
5. Remove the Old Sand
With the tank drained, you can now remove the old sand. The easiest way to do this is with a shop vacuum, which can quickly and efficiently suck out the sand. If you don’t have a vacuum, you can use a small scoop or your hands to remove the sand, though this method will take longer.
Be careful not to damage the laterals at the bottom of the tank. The laterals are the small, perforated tubes that allow water to flow out of the filter while keeping the sand inside. If they become damaged, they’ll need to be replaced, which can add to the cost and time of your project.
6. Clean the Filter Tank and Laterals
After you’ve removed all the old sand, take the time to thoroughly clean the inside of the filter tank and the laterals. Use a garden hose to rinse out any remaining sand, debris, or residue. Inspect the laterals for any cracks or signs of wear. If you find any damage, now is the time to replace the laterals.
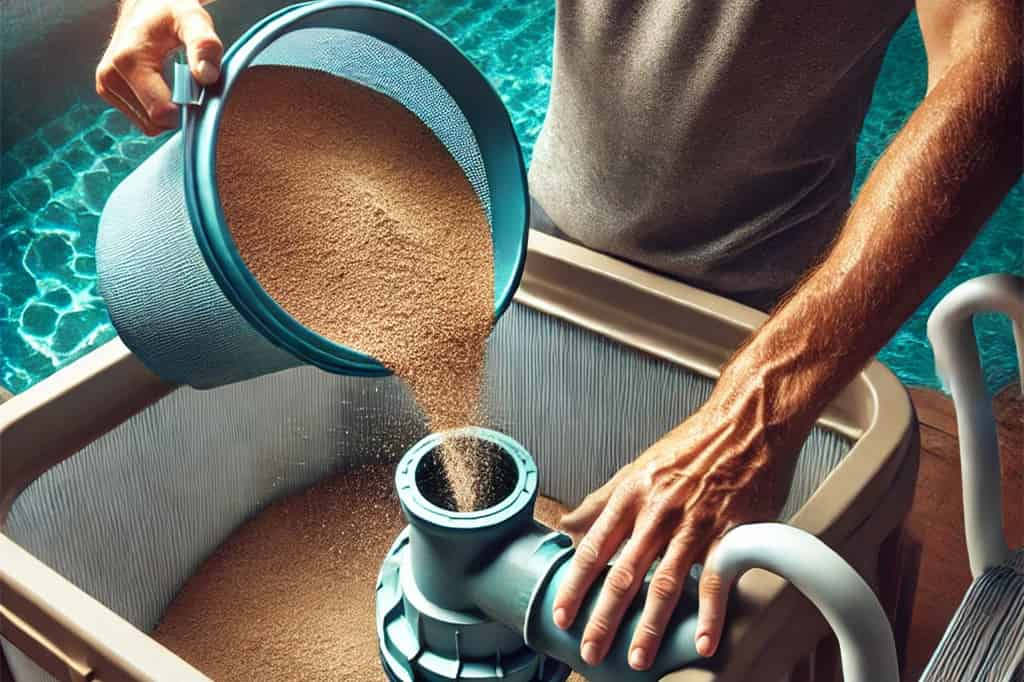
7. Add the New Sand
Once the tank is clean and the laterals are in good condition, it’s time to add the new sand. Before adding the sand, it’s a good idea to fill the tank with enough water to cover the laterals. This helps cushion the laterals as you pour in the sand, preventing damage.
Carefully pour the new pool filter sand into the tank, making sure it’s evenly distributed around the laterals. The amount of sand required will depend on the size of your pool sand filter; check the manufacturer’s instructions for the correct amount. Generally, the sand should fill about two-thirds of the tank.
8. Reassemble the Filter
After the new sand is in place, reattach the filter valve or multiport valve to the top of the tank. Make sure the O-ring is in good condition and properly seated to prevent leaks. If necessary, apply a small amount of lubricant to the O-ring to ensure a tight seal. Secure the valve with the bolts, clamps, or screws you removed earlier.
9. Backwash the Filter
Before you return the pool sand filter to normal operation, it’s essential to backwash the filter to remove any dust or debris from the new sand. To do this, set the filter valve to the “Backwash” position, turn on the pump, and let it run for a few minutes until the water runs clear. Then, set the valve to the “Rinse” position and run the pump for another minute or two.
10. Resume Normal Operation
Finally, set the filter valve to the “Filter” position, turn on the pump, and resume normal operation. Your pool sand filter is now ready to keep your pool water clean and clear with the new sand in place.
Conclusion
Replacing the sand in your pool sand filter is an essential task that ensures your swimming pool stays clean and inviting. By following the steps outlined above, you can successfully replace the sand and extend the life of your filter. Proper maintenance of your swimming pool filter will not only keep your water clear but also reduce the strain on your pool’s filtration system, saving you time and money in the long run.